")
You’re here because you want to make your very own Discord bot.
Well, I’ll tell you right now, there’s something extremely satisfying about building up your own bot from scratch and then seeing it in action on your server.
This guide will walk you through to the finish line, step by step.
Be sure to follow the quick navigation icons below to jump around in this guide and find exactly what you’re looking for!
How to Make a Discord Bot
After reading this guide you’ll have a clear path forward to creating your own bot in 5 popular programming languages (including a ‘zero code, no programming required’ option), and you’ll also have a clear picture of how Discord bots work behind the scenes.
We’ll start off by going over the basics. How do Discord bots work after all? What’s going on behind the scenes? Then we’ll jump into creating bots in Python, Java, C#, JavaScript, and even in mobile development environments.
Once we have that covered, we’ll show you how to create your own discord bot with absolutely no coding, show you the easiest method to get a bot off the ground (in just 15 minutes…), and then go into some more advanced topics like 24/7 bot hosting, getting your bots online, and idea generation to help you come up with the next big Discord bot sensation.
Let’s get rolling…
What Are Discord Bots?
Discord bots are essentially “automated robots” that join your server and respond to events. You’ll see them show up in channels just like a regular user would, with the only real differentiator being their blue “bot” tag.
Your typical Discord bot has some programming/code in the background that tells it what to do when it encounters a trigger you specified. This means that when something happens in Discord, your bot sees it happen and takes action. You get to program that action.
A great example is the ping pong bot we have below. When it’s online, the bot is in my channel and actively listening to all chat messages.
Every time a chat message is sent, the bot gets a little notification from the Discord API saying, “Hey, we have a callback/event! A chat message was sent!”
The bot then reads this message and looks for the word “ping”. If it finds the word ping in the message, it responds saying, “pong!”
")
This is a simplified example, but that’s essentially how bots work on the back-end.
Whenever certain events happen in your Discord channel your bot gets notified through the Discord API (Application Programming Interface).
If your bot has code to handle an event, then it goes through and runs that bit of code you associated with the event.
In the ping-pong example, we created code that handles any new chat messages (our event trigger).
This code looks through any new messages for the word ‘ping”, and if it finds it, sends back a chat message through the Discord API into our channel. Our bot officially speaks!
")
Libraries Simplify Your Life
The good news is, there have been dozens of packages created for the Discord API making it easier to use. Instead of writing low-level code and handling a bunch of web requests, a library does all of the hard work for you.
To put it simply, libraries package up everything you can do in the Discord API into a nice, clean set of commands. You can then take these commands and create your bot with much less code and much less hassle.
We will be using Discord API libraries throughout this guide to make all of this information easier to digest and easier to follow. In fact, we don’t see why you wouldn’t use a library! It’s highly recommended, and it’ll save you a bunch of time.
Discord Bots: Behind the Scenes
We talked about how Discord bots work in a general sense, but let’s get into the details a little bit.
Take a close look at the diagram below:
Discord users, people who are connected to your server, are on the left.
The official Discord server and API, maintained and run by Discord itself, is in the middle.
Your bot server is on the right and can be running on either your personal computer or an official hosted server that runs 24/7.
And finally, your bot code is also on the right. This is the actual code behind your bot that lets it do what it needs to do.
")
These are the four primary elements of any Discord bot.
Discord users interact in a channel, send messages, and take certain actions.
Your bot (running on your server) then interacts with Discord through their API, figures out what events or triggers happened, and reacts in a pre-programmed way.
What is OAuth2 and How Does it Work?
Your Discord bot connects to the Discord API through “OAuth2”. This is also how you add bots to channels — using OAuth2 requests.
We’re not going to dive into OAuth in detail right now, but you should remember that OAuth2 is how you’re able to add a Discord Bot to your server as well as login/authenticate with the Discord API.
Its real power is when you realize you can do all of this without giving out your Discord username and password. It all works off of temporary access codes called “tokens”. This is the beauty of OAuth2.
Advice for Beginners:
And although it’s good for you to know what it is, it’s highly unlikely you’ll actually be programming anything at such a low level if you’re using libraries (as we suggest throughout the rest of this guide).
Advice for ‘Code Monkeys’:
If you’re feeling adventurous and willing to tackle some low-level code, you can skip the library altogether and write each individual web request. It’s much more challenging, but at the same time, you’ll learn significantly more through the struggle.
A Lot of What You Need Can Be Found On GitHub and StackOverflow
GitHub is the modern equivalent of “open source heaven”, as we like to call it. Every project that’s made public can be accessed, modified, “branched”, and downloaded.
If you go to GitHub Explore, type the keyword “discord bots”, and browse around, you’ll find thousands of great code examples for you to use.
Whenever you get stuck, remember that someone has likely encountered and solved the same problem at least once before. You can browse around GitHub for code examples and some inspiration.
And in case you don’t find the answer to your question on GitHub, StackOverflow is guaranteed to have the answers you need.
If you’ve never heard of StackOverflow, it’s essentially a Question & Answer forum for programmers and developers. It’s the “Quora of Programming”. Hop on, do a quick search, or even post your own question if you’re looking for an expert opinion.
The only thing I can guarantee is, if you don’t ask, you won’t get answers!
Always ask and search around if you’re stuck for more than ~30 minutes to an hour trying to figure out a problem on your own.
The Ultimate Tutorial Awaits…
Now that we’ve covered the basics, you should be primed and ready to go forward with creating your first Discord bot.
You have an understanding of how Discord bots work behind the scenes, and you know how to get help when you need it.
The most important thing is to stick to one single programming language or platform for bot development and master it.
If you keep jumping from platform to platform, language to language, you won’t get anywhere. But if you focus on one singular goal and create your first bot without any interruptions — you’ll be well on your way to botting success!
Python: The Simple, Readable Language for Your Discord Bot
")
Python is a programming language that strives for readable code above all else. You’ll find that Python has plenty of white space — which in turn makes it easier to read and write.
Getting Python for Discord Bot Development
The best place to get a hold of Python is on the official website: https://www.python.org/.
If you’ve never installed Python before and are looking for a great step-by-step guide to do so, then I’d recommend taking a look at this guide from RealPython.
They wrote an awesome guide that shows you how to get Python set up and configured on Windows, Linux, macOS / Mac OS X, iOS, and Android!
So go get it downloaded, follow the installation guide, and you’ll be ready for the next step — setting up the discord.py library.
")
Setting Up and Using the Discord.py Library
Like we mentioned earlier, you should be using a library whenever possible to avoid writing tedious low-level code around the Discord API.
The best library to use for Python is discord.py, available on GitHub.
Luckily, discord.py has very thorough documentation on its wiki — you should be able to find all of the answers you need, both in getting it set up for your project and examples of how you’d start coding a simple Discord bot.
Installation Help:
To set up discord.py on your machine, you can follow the step-by-step process detailed here on the official discord.py wiki.
That guide walks you through the process of setting up discord.py, getting it running, explaining how events work, and much more…
")
Making a Very Simple Discord Bot in Python
The discord.py documentation library has a great tutorial on making a quick bot in Python in as little as a few minutes!
You can find the full tutorial to a simple bot over at this link.
I’d recommend going through that link, reading through the “Minimal Bot” section, and then looking at the step-by-step walkthrough that explains exactly what’s going on in the code.
Here’s the code you’ll be using to create your first minimal Python Discord bot:
import discord

client = discord.Client()

@client.event
async def on_ready():
    print('We have logged in as {0.user}'.format(client))

@client.event
async def on_message(message):
    if message.author == client.user:
        return

    if message.content.startswith('$hello'):
        await message.channel.send('Hello!')

client.run('your token here')
Here’s what this code does:
Once the bot is logged in and ready, it’ll show a message on the Python console you ran your bot from: “We have logged in as {bot username}”.
Whenever a message is received (in the same Discord channel your bot is in) from someone else (other than the bot itself, we don’t want the bot to respond to its own messages!), if that message starts with “$hello” then the bot responds back to the channel saying, “Hello!”
Very simple, but also a very good start in Python bot development if you’re a beginner!
Adding Your Python Bot to a Server
To connect to your bot and add it to your Discord server, you’ll need to create an Application in Discord and then get your own Discord Bot Token assigned to you.
Notice in the code above that your bot actually runs with the last line of code: “client.run(‘your token here’)”.
You’ll have to replace ‘your token here’ with your bot’s token.
Here’s a detailed guide to getting your own bot token and adding your bot to your server.
Your Next Steps in Python Bot Development
Now that you know how to make an extremely simple Discord bot in Python, it’s time to step it up a notch.
Scroll down to the “Discord Bot Ideas” section in this guide and come up with a few bots you think you’d enjoy creating.
After you come up with your list, I’d recommend browsing around on GitHub (filter by programming language: Python) and typing your bot ideas in to see if anyone has created anything similar.
Pay attention to how they laid out their bot, how they laid out their code, if they have any comments in their code to make reading it easier, etc.
Looking at and analyzing other people’s code can be a great way to uncover certain bits and pieces of your idea that you hadn’t thought of yet.
After you have your idea and a good sense of how other similar bots look, it’s time to get into the grind and start coding.
If you want to learn how to create Discord bots step by step and dive into more advanced topics, join the WriteBots community. We’ll send you tips, tricks, code samples, lessons, ideas, and more. It’s the perfect opportunity for you to learn more and level up your bot creation skills.
Java: Coding Your Discord Bot in a Robust, Popular Language
")
Java is a very popular, stable, and robust programming language that has been around for decades. There’s no shortage of demand for the language, with thousands upon thousands of developers writing Java code every single day.
If Java is your bread and butter, or if you’re just looking to get into Java and need a good starting point, then this just may be the perfect fit!
Making your own Discord bot in Java is going to teach you all the nuances of setting up a project, configuring it, adding a library/wrapper, writing code, and finally getting your bot online.
We’ll be talking about two Java Discord wrappers here: JavaCord and Discord4J. Each has its own pros/cons and slightly different event handler syntax, so it’ll be up to you to compare the two and choose which one you feel fits your coding style more.
In either case, they’re both very powerful libraries that’ll get the job done.
So let’s get to it! We’ll talk about configuring your environment, choosing your IDE, and getting a library set up for Discord bot creation in the next section.
Configuring Java for Discord Bot Development
If you’ve never written code in a language like Java or C#, you’ll immediately notice that setting up your environment is a bit different compared to if you were using node.js/Javascript, for example. I only mention this because when it comes to Discord bots, JavaScript seems to be the most popular language to go with (I see it everywhere!)
Java development is typically done through an IDE (Integrated Development Environment) that lives on your local system. This is essentially a software suite that you use to write, debug, and compile all of your code.
Before you can start writing any code, however, you’ll first choose an IDE, download it, install it, and then get a project up and running.
Luckily, this isn’t complicated stuff. Let’s dive into how you can configure your IDE and chosen Library/Wrapper.
The Best Java IDEs for Discord Bot Creation
IntelliJ IDEA and Eclipse are the top two Java IDEs we’d recommend to any Java Developer. They’re proven, they’re stable, and they have great feedback from devs across the board.
")
IntelliJ IDEA has a free, open-source community version that you can download and start using in minutes. It’s cross-platform and supports development on Windows, Mac, and Linux.
I personally like this IDE since it has a more modern look and feel compared to Eclipse, but this is just my personal preference. They’re both great IDEs.
You can download IntelliJ IDEA right now and get started.
")
Eclipse is a Java IDE that’s been around for quite a while (originally brought to life by IBM in 2001). It’s a very stable, robust development environment that developers all around the world continue to use and love.
Eclipse is also cross-platform and runs on Windows, Mac, and Linux.
You can download Eclipse right now and get going in Java.
Top Discord Wrappers/Libraries for Java Bot Development
When it comes to Java API Wrappers/Libraries for Discord JavaCord and Discord4J come out on top as the most widely used and supported.
To simplify your life and start writing your bot as soon as possible, I would strongly recommend getting one of these libraries before starting development.
We’ll walk through the setup of each one, and then show you what implementing each wrapper in actual Java code looks like.
Before we get too far: Gradle vs. Maven
")
One of the first things you’ll notice when setting up your development environment for JavaCord and Discord4J is the delineation between Gradle and Maven. What are they, and what’s the difference?
Well, both Gradle and Maven are “Build Automation Tools”. This means that when you hit “Build” or “Compile” on your project, Gradle/Maven goes through the process of compiling your code, packaging it, and running any automated tests you may have set up right off the bat.
You essentially set up a series of steps that happen every time you build/compile your code, saving you the trouble of doing it manually on each build.
We’re not going to get deep into the Gradle vs. Maven debate in this guide as it’s out of scope, but we do have a great resource for you to read through if you’re interested in all of the nuances and understanding when you should use one or the other.
Take a look at this Gradle vs. Maven comparison guide from DZone.
What does this mean for Discord bot development?
It means you’ll have to choose either Gradle or Maven to move forward with, and then add either JavaCord or Discord4J as a dependency so that these libraries are included in your bot on compile time.
If this sounds complicated, don’t worry, we’re about to show you exactly how to set this up.
Integrating JavaCord or Discord4J into your Discord bot project
First thing’s first: you’ll have to make a choice between JavaCord or Discord4J!
Here are a few fun facts to hopefully make your decision a bit easier.
Update Frequency:
Discord4J is updated much more frequently than JavaCord. If you look at release tags generated by Discord4J and release tags generated by JavaCord over their history, Discord4J is the winner. If you want a library that’s frequently updated, I’d choose Discord4J.
Contributors Working on the Project:
Discord4J (as of the time this guide was written) has nearly double the contributors of JavaCord. This means that there are more people working on improving it, which increases the likelihood you’ll be dealing with less buggy code and a more robust framework. Here is the contribution chart for Discord4J and the contribution chart for JavaCord.
Syntax Differences and Implementation:
Both libraries/wrappers use event listeners, where you create code that “filters” out particular events and then run your own code snippets as responses (once those events are triggered).
Discord4J is a reactive Java Wrapper for Discord’s API.
JavaCord is a library for Discord’s API boasting easy multi-threading.
Take a look at the two code examples for a simple “Ping Pong” below and choose which one appeals to you the most.
Discord4J – Simple Ping Pong Bot Code Example
public class Bot {

  public static void main(String[] args) {
    DiscordClientBuilder builder = new DiscordClientBuilder("TOKEN HERE");
    DiscordClient client = builder.build();

    client.getEventDispatcher().on(ReadyEvent.class)
        .subscribe(event -> {
          User self = event.getSelf();
          System.out.println(String.format("Logged in as %s#%s", self.getUsername(), self.getDiscriminator()));
        });

    client.getEventDispatcher().on(MessageCreateEvent.class)
        .map(MessageCreateEvent::getMessage)
        .filter(message -> message.getAuthor().map(user -> !user.isBot()).orElse(false))
        .filter(message -> message.getContent().orElse("").equalsIgnoreCase("!ping"))
        .flatMap(Message::getChannel)
        .flatMap(channel -> channel.createMessage("Pong!"))
        .subscribe();

    client.login().block();
  }
}
JavaCord – Simple Ping Pong Bot Code Example
public class MyFirstBot {

    public static void main(String[] args) {
        // Insert your bot's token here
        String token = "your token";

        DiscordApi api = new DiscordApiBuilder().setToken(token).login().join();

        // Add a listener which answers with "Pong!" if someone writes "!ping"
        api.addMessageCreateListener(event -> {
            if (event.getMessageContent().equalsIgnoreCase("!ping")) {
                event.getChannel().sendMessage("Pong!");
            }
        });

        // Print the invite url of your bot
        System.out.println("You can invite the bot by using the following url: " + api.createBotInvite());
    }
}
I personally chose Discord4J since it’s the most active and more frequently updated of the two, but JavaCord is an awesome choice as well.
If you have a tough time deciding you can always create a small simple bot in both and see how each one works/functions for your purposes.
Either way, let’s get to where we actually set up both of these libraries in our project!
Prerequisites:
By this point, you should have either IntelliJ IDEA or Eclipse installed as an IDE and ready to go on your machine.
You should know whether you’re going to be using Gradle or Maven as your build automation system.
And finally, you should have a good idea of which library/wrapper for the Discord API you want to use first: JavaCord or Discord4J.
Setting up JavaCord
To get started with JavaCord, you should go to this link and start reading through the download/installation section.
There are guides on setting up with both Gradle and Maven, so no matter which build manager you chose earlier you’ll have everything you need to get going.
Link to download JavaCord (latest release).
On the getting started page you’ll see an “IDE Setup” section with several guides for IntelliJ / Eclipse and Gradle/Maven.
Direct link to the IDE Setup section of the JavaCord Guide.
")
Go through that guide to configure JavaCord in either IntelliJ or Eclipse, and you’ll be ready to start coding!
Helpful JavaCord Links:
https://github.com/Javacord/Javacord
Setting Up Discord4J
")
To get started with Discord4J, go to this link and start reading through and following along with the setup guide.
You’ll see a download/installation guide for both IntelliJ IDEA and Eclipse as well as Maven and Gradle.
Here’s a link to the download/installation section of the Discord4J Guide.
")
Once you have Discord4J all configured and ready to go, I recommend following along with this simple bot guide on the wiki.
That guide goes over how Discord4J works (subscribing to events, sending messages, etc.) and will give you a great starting point.
Helpful Discord4J Links:
Your Next Steps in Java Bot Development
By now your Java bot development environment is all set up, configured, and ready to go!
If you’ve been following along, you’ve likely gone through one of the basic bot tutorials provided by the library/wrapper of your choice (either Discord4J or JavaCord), and I’m sure you’re getting excited about all of the potential bots you can create.
What should you do next?
Well, if you haven’t already, we recommend scrolling down to the bottom of this guide to the “Discord Bot Ideas” section and going through an idea generation exercise.
This will help you uncover any interesting and unique bot ideas that might’ve been hiding in your head all along.
Once you’ve done that, it’s up to you to start coding and making the Discord bot of your dreams.
If you want to learn even more about Discord bot development and learn even more tips, tricks, methods, and tactics on the subject of bot development, then join the WriteBots community today!
C#: Using .NET to Bring Your Discord Bot to Life
")
C# (C-Sharp) is a general-purpose programming language that runs on the .NET Framework.
Today we’re going to cover the exact steps you’ll need to take to start making your very own Discord bot in C#.
Personally, I’ve always been a fan of C# and the .NET framework for quickly getting desktop projects up and running.
With an IDE like Visual Studio you can easily set up a project, create a GUI (Graphical User Interface that includes all of your application’s buttons, textboxes, etc.), assign events to your GUI, and start creating a fully functional application.
Let’s go over how you set up your IDE for C# bot development, and then cover the best Discord API libraries/wrappers available.
Choosing an IDE for C# Discord Bot Development
The first step we need to take is to choose a solid, reputable IDE for our C# development environment. Visual Studio and Visual Studio Code (there is a difference!) are both great for writing C# code. We’ll cover how to get both of these setup and configured for bot development.
Visual Studio: The most popular C# IDE (recommended)
Visual Studio, developed and maintained by Microsoft, is the go-to IDE when it comes to .NET programming.
There are both paid and free versions of VS available depending on use, but you can get the Community edition to start (just be sure to read their license limitations in detail).
If you’re just getting started with C# and find yourself using Windows as your primary operating system, I would highly recommend getting Visual Studio set up and ready to go. It’s the easiest, most “out of the box” IDE for C#.
If you use Mac or Linux as your go-to OS, read on to Visual Studio Code.
You can download Visual Studio from this link here.
Visual Studio Code: A great cross-platform C# editor
If you’re a Mac or Linux user, then, unfortunately, you won’t be able to use Visual Studio without an emulator or virtual machine (which might be more hassle than it’s worth to get configured.)
The easiest solution here is to use a cross-platform editor for C# development: Visual Studio Code. It works great out of the box on Mac OS, Linux, and Windows.
You can Download Visual Studio Code for free and start coding.
Important: Both of the popular discord libraries/wrappers we’re using in this guide (Discord .NET and DSharpPlus) have issues with Mono (another cross-platform.NET framework). Do not use Mono for developing your Discord bot if you’re going to be using one of these libraries! Your bot will crash! As an alternative download .NET Core, which is also available cross-platform on both Linux and Mac OS
Once you have your IDE of choice downloaded and installed, it’s time to decide on a Discord API library/wrapper for your bot.
C# Discord API Libraries for Bot Development
Out of all the libraries/wrappers available for C# bot programming, we narrowed it down to the two that are most actively maintained: Discord .NET and DSharpPlus.
Both libraries are 100% open-source and viewable in their entirety on GitHub. Here’s the repository for Discord .NET and here’s the repository for DSharpPlus.
But which wrapper/library should I pick for my bot?
This is always a tough decision, so we’ll give you a few stats for comparison.
Discord .NET has very stable releases (lower frequency of releases) and a larger development community that keeps the library updated and maintained.
DSharpPlus, although it has a smaller development community, iterates fast and pushes out fixes and suggestions incredibly quickly.
In my eyes, this is a choice between a library/wrapper with solid support and backing (Discord .NET) or a library/wrapper with quick development and bug fixes (DSharpPlus).
As of this guide’s publication, both development communities are very active, and both projects continue to be maintained.
Let’s walk through setting each of these up in your project.
Setting up Discord .NET and DSharpPlus for Bot Development
Discord .NET and DSharpPlus are both distributed through the NuGet Package Manager — this is great news!
If you’re not familiar with NuGet, it’s an easy way to add libraries into your project without going through the work of downloading them separately, copy/pasting them into your project folder, including them, etc.
Instead of manually adding dependencies to your project, NuGet lets you do it automatically through a simple add-on.
Visual Studio has NuGet built-in.
Visual Studio Code has an add-on available: NuGet Package Manager.
Discord .NET Setup
To install Discord .NET through the NuGet Package Manager, take a look at this guide on the Discord.NET Wiki.
There are installation instructions for Visual Studio and Visual Studio Code available on that wiki page:
")
Once you have your IDE and Library/Wrapper configured, you can move on to the next section — actually coding and creating your own Discord bot in C#!
DSharpPlus Setup
")
To set up and configure DSharpPlus in Visual Studio or Visual Studio Code, follow along with this guide on the D#+ documentation page.
The guide above includes step-by-step instructions and screenshots for getting DSharpPlus added to your project through the NuGet Package Manager, and it even includes some basic code you can use to get a basic bot up and running quickly (to make sure your setup is correct).
")
Once DSharpPlus is configured, you’re ready to start coding!
Programming Your C# Discord Bot
At this point, you should have your IDE installed and a library/wrapper ready to go and added to your project.
If you haven’t done that yet, you can do it now: Create a new project in Visual Studio / Visual Studio Code and add your library of choice to the project through the NuGet package manager.
If you’re using Discord .NET:
Follow along with this guide for creating your first, basic Discord bot.
Your code for a very basic bot will look something like this:
public class Program
{
    private DiscordSocketClient _client;

    public static void Main(string[] args)
        => new Program().MainAsync().GetAwaiter().GetResult();

    public async Task MainAsync()
    {
        _client = new DiscordSocketClient();
        _client.Log += Log;
        await _client.LoginAsync(TokenType.Bot,
            Environment.GetEnvironmentVariable("DiscordToken"));
        await _client.StartAsync();

        // Block this task until the program is closed.
        await Task.Delay(-1);
    }
    private Task Log(LogMessage msg)
    {
        Console.WriteLine(msg.ToString());
        return Task.CompletedTask;
    }
}
If you’re using DSharpPlus:
You can code along with this guide to get your bot up and running.
A very basic Discord bot will look like this:
class Program
    {
        static DiscordClient discord;

        static void Main(string[] args)
        {
            MainAsync(args).ConfigureAwait(false).GetAwaiter().GetResult();
        }

        static async Task MainAsync(string[] args)
        {
            discord = new DiscordClient(new DiscordConfiguration
            {
                Token = "<your token here>",
                TokenType = TokenType.Bot
            });

            discord.MessageCreated += async e =>
            {
                if (e.Message.Content.ToLower().StartsWith("ping"))
                    await e.Message.RespondAsync("pong!");
            };

            await discord.ConnectAsync();
            await Task.Delay(-1);
        }
    }
If you followed along with either of those guides linked above, you have successfully created your very first Discord Bot in C#. Congratulations!
And if you’re wondering what you should do now, we’ll cover the steps you should take next in the upcoming section.
Next Steps in C# Discord Bot Development
If you’ve gotten this far you know all of the steps required to make your very own Discord bot in the C# programming language. That’s a great accomplishment!
But what should you do next? How do you figure out the best path forward?
Well, before anything, we would strongly recommend that you read the “Discord Bot Ideas” section of this guide to get a good sense of the type of bot you’d like to create. Write down every bot idea that comes into your head.
It doesn’t even matter if it sounds like a bad idea right now, you want to get everything down and filter it out later.
After you’ve done that, I’d personally hop on an open-source platform like GitHub, filter search results by programming language (C#), and start looking at all of the open-source bots out there.
Looking at other people’s code is a great way to get ideas and see how others are structuring their code.
Your next steps should be to filter down your idea list to the one idea you want to pursue right now, and then get coding! Keep practicing, keep learning, and keep on coding — this is how you succeed with bot programming.
If you want to learn more about Discord bot development and making your own Discord bots on demand, then join the WriteBots community today.
JavaScript: The Most Popular Way to Make a Discord Bot
")
If you’ve been searching around and looking at some other Discord bot creation guides, you’ve likely noticed that nearly all of them are written in… JavaScript.
Using JavaScript (with node.js, specifically) is a trend because it’s easy to set up compared to more rigid development environments, and there’s no particular IDE that you have to use to make it work.
JavaScript is a great language for beginners to pick up and make their first Discord bot in, particularly because there’s a ton of learning content out there.
No matter where you get stuck, you’ll always be able to find an answer!
Today we’re going to go over how you can build a Discord bot from scratch using JavaScript and Node.js.
")
Choosing an Easy to Use JS Library for Your Discord Bot
To make this process a lot easier on ourselves we’re going to use a library that helps us talk to the Discord API in JavaScript.
For this guide, in particular, one of the easiest libraries I’ve found to use for JS / Node projects is discord.js.
Discord.js is going to significantly simplify your code and make it much easier to get projects up and running as quickly as possible.
We’re going to add discord.js to your project in the next section of this guide where you actually start coding your bot.
Before that, we’ll create your bot application in Discord and generate a Token that’ll let your bot communicate with the Discord API.
Creating Your Discord Bot Application and Generating a Token
Creating your bot application and getting a custom token assigned to your bot is the first step you’ll need to take to bring your bot to life.
Once you register your bot on Discord, you can start inviting it to your channels. Once it’s invited to your channel, then it can communicate with your node.js code and actually start to function.
You’re going to want to follow along with this Discord Bot Token Guide.
It’ll show you, step by step, how to create your application in Discord (and add an awesome icon to it!)
Then it’ll walk you through the process of retrieving your token and inviting your bot to whatever server you choose.
Once you’ve got your Discord bot token created, it’s time to move into setting up your development environment and actually programming your bot!
Important: A bot token is essentially the “key” to controlling your Discord bot. This is meant to be kept secret! Do not under any circumstances share your token with anyone. A token leak scenario can be a real nightmare — something you’d never want happening with your bot.
Developing Your Discord Bot in JavaScript / Node.js
Now we get to the fun part: actual development and real-life coding! Let’s walk through how to get your bot up and running ASAP.
Installing Node.js and Discord.js
The first thing we’re going to do is set up node.js and discord.js on our machine. This can be easily done on Windows, Mac, and Linux; as a general note, everything JavaScript/Node.js related will be platform-independent.
Follow along with this guide to Setting Up Node.js and Discord.js on your machine.
")
In this section, you’ll go through the process of installing node.js on Windows, macOS, and Linux.
You’ll learn how to create a project folder and use npm (node package manager) to install discord.js in your project.
Creating Your Bot’s Code Framework
Once you’ve gotten node.js installed and discord.js included in your project, you’re ready to start writing some actual code.
Follow along step by step with this guide to getting your bot’s code framework in place.
")
You’ll choose a code editor of your choice, with the most popular options being Visual Studio Code, Atom, or Sublime Text.
Personally, I use Visual Studio Code and Atom for most of my projects and prefer Atom a bit more due to its speed, usability, and clean look and feel.
Once you’ve created a new file in your project and loaded it up in your code editor, you’ll begin by writing a simple bit of code that logs your bot into your server:
// Require the necessary discord.js classes
const { Client, Intents } = require('discord.js');
const { token } = require('./config.json');

// Create a new client instance
const client = new Client({ intents: [Intents.FLAGS.GUILDS] });

// When the client is ready, run this code (only once)
client.once('ready', () => {
	console.log('Ready!');
});

// Login to Discord with your client's token
client.login(token);
We include the discord.js library in our project and create a new instance of the discord.js “client” object.
Once our bot is logged in (‘ready’), then we’ll write a message to our node.js console window that says, ‘Ready!’
If you look down at the last line, that’s where the token you generated earlier goes, and it’s what allows your bot to communicate through the Discord API.
As you continue going through the guide, you’ll learn how to listen for chat messages and actually reply to a chat message, in turn creating a very simple “ping-pong” bot.
Next Steps With JavaScript and Node.js Discord Bot Development
Congratulations! If you’ve gotten this far, you know how to create a bot from scratch in JavaScript / Node.js.
What should you do next?
Well, as a first step, I’d recommend that you go down to the “Discord Bot Ideas” section of this guide and go through the idea generation process to come up with an idea for the bot you want to make next.
Once you’ve done that, I strongly recommend that you read through all of the guide and topics over at discordjs.guide. They have some excellent content out there and cover everything from command handling to permissions to databases.
And that’s all there is to it.
Get out there, create your next project, and you’ll have a working Discord bot up and running before you know it!
Mobile Development: Making a Discord Bot On Your Phone
You might be thinking, “Wow, it’s really possible to make a Discord bot from your phone?!”
The answer is yes… with some restrictions.
Today we’re going to go over mobile bot development and learn step by step how you can actually code your next Discord bot directly from your phone.
Before we get into the details, there is something I should mention upfront:
You will not be able to actually host your Discord bot from iOS (due to internal restrictions).
You will be able to host your Discord bot directly from Android. Android allows it.
If you are interested in hosting a Discord bot directly from your phone, this can be done using Termux and pm2. The only issue is, whenever your phone locks your bot will disconnect. This is why we recommend using the development method we’re recommending below to keep your bot up 24/7 and allow you to edit it directly from your mobile device. Win-win!
The Best Option for Discord Bot Development on Mobile
I’m not going to sugarcoat it — coding on mobile is going to be tougher than on a regular desktop/laptop machine. If you have a large device (like an iPad or Android tablet for example), that’ll make things much easier.
My recommended method for doing this on mobile is to host your code on a third-party server and then use an SSH (secure shell) client on iOS/Android to log in and manage your bot.
This has several benefits. For one, your bot will be up and running 24/7, and it won’t shut off whenever you lose service on your phone, or even when you get a lock screen (this can happen when hosting on Android).
Two, you’ll be able to access it on any device — all you’ll need is to download and install an SSH client.
Third-party hosting is the most practical and reliable way to make this happen, so that’s the path we’re going to go down.
To sum it up, we’re going to be:
- Hosting our bot on a third-party server
- Connecting to it from our phone via. SSH
- Modifying the bot through SSH and editing directly through a text editor.
- Starting our bot with node.js through the SSH client and watching it run!
Let’s walk through how this is done.
Setting Up Your Third-Party Hosting Server
The first thing you’ll want to do is actually set up your server.
For our purposes here, we’ll be using a third-party Virtual Private Server (VPS) to host our bot, and we’ll be connecting to this VPS for modifying our code, uploading bot files, etc. This is the best way to go, especially if you’re trying to develop a bot on iOS.
We’re going to follow along with this detailed guide on Discord Bot Hosting. It’ll tell you everything you need to know to get a VPS up and running.
The first thing you’ll do in that guide is set up a VPS account and deploy an “instance”.
You’ll then log in to your VPS, create a folder for your bot, and perform some initial setup for a JavaScript / Node.js bot.
Even though we’re using Node as an example, you could just as easily set up another code runtime environment (like Python or Java, for example) and edit your bot the same way from your mobile device.
Once your VPS is all set up and ready to go, we’ll talk about connecting to your VPS through SSH (Secure Shell) and modifying/editing your bot’s files!
Connecting to Your VPS On Mobile
You’re at a great point in time here.
You’ve set up your VPS (if you haven’t, go back to the previous section and follow along with the Discord bot hosting guide), and now you’re ready to connect to your VPS through your mobile device!
There are two ways you can do this (depending on if you’re using iOS or Android).
If you’re using iOS: Download the Textastic SSH Code Editor
")
If you’re using Android: Download the Termux Terminal Emulator
")
Once you’ve got an SSH Client installed on your device, pull up your VPS Server Information Page and grab your login info.
Log into your VPS from your mobile device, and you’re home free!
From here you can edit your bot’s files and send commands to turn your bot on, turn your bot off, etc.
Important Note: If you want the full scoop about how to get this all set up on your VPS, do a full read-through of our Discord bot hosting guide. It’ll give you the exact information you need to get this all set up and running for Node.js.
And that’s all there is to it. You’ve successfully set up a Virtual Private Server to run your bot 24/7, 365, and then you learned how to connect to and modify your bot’s files through your mobile device.
This is the most rock-solid way I’ve found of doing this; but as always, if you have any suggestions, feel free to leave a note/comment!
I wish you the best of luck on your “mobile-bot-coding” journey!
Hosting Your Discord Bot for 24/7 Uptime
You have a Discord bot ready to be put online. How do you make sure it stays up and running 24 hours a day, all year without any issues?
You can always run it on your own personal computer, but any power outage or network lag will affect all your users…
You could use a free hosting solution, but those are never stable or reliable.
What should you do?
Using a Virtual Private Server (VPS) to Reliably Host Your Discord Bot
The answer is — use a VPS!
Virtual Private servers are the most reliable way we’ve found to host a Discord bot and keep it online.
The best part is, if your bot starts being used by hundreds of servers, you can easily upgrade your VPS (in just a few minutes) and add more bandwidth/memory/capability.
It’s a win-win situation.
We’ll be following along with our super detailed guide on Discord Bot Hosting to get our VPS up and running.
")
I recommend you read that guide from start to finish and follow along with the VPS setup (every step is illustrated); the good stuff starts at this section of the guide.
Once you’ve gone through the VPS setup process, you’ll have a fully functioning Virtual Private Server that you have full control of.
What’s really cool about that setup is the fact that we can use a “Process Manager” to run multiple bots at once on the same VPS (here’s the PM2 Process Manager section of the guide).
This means that assuming your VPS has enough memory and bandwidth to handle your multiple bots, you can run multiple bots at once on a single server.
And in case you don’t have enough memory (or are just starting out with the cheapest VPS plan), you can easily upgrade your VPS by making a “snapshot” and transferring it to a more powerful instance.
Either way, hosting your Discord bot doesn’t have to be extremely complicated and technical.
As long as you follow that guide step by step, you should have a working bot on your own server in around an hour, perhaps a bit more your first time going through the process.
And that’s Discord bot hosting in a nutshell!
Note: It may be a good idea to set up a “test server” VPS for trying the waters and seeing how your bot performs. If you’re trying to host your bot 24/7 and take it off your PC, then you should’ve already tested your bot thoroughly on your PC. In theory, when you get it up on a dedicated VPS, it should run even better! The main idea here is, to test it out for a day or two to make sure things work as intended.
Zero Code: Using Pre-Built Tools to Make a Discord Bot
")
Up until this point we’ve been talking about creating your own Discord bot by writing code and setting up a development environment.
What if I were to tell you that you can create your very own bot without any code. That’s right, zero programming is required.
Disclaimer: Even though these methods require no code to get started, which is a big plus, they are also very limited. You’ll have trouble creating complicated bots as you’ll be limited by the bot creation software itself. Keep in mind that these tools will work great for small, simple bots, but when you start to get into more complex tasks, they likely won’t cut it.
Even though the list is a little short as of right now (there aren’t many tools like this that are actually working and decent), we’ll continue updating this list as new “no code required” alternatives make their way to the web.
If you have any suggestions or know of an awesome new tool that you’ve recently found, leave a comment below!
Discord Bot Maker
When it comes to creating Discord bots without any code, this is the closest we can get to a decent solution. It’s not perfect, but it gets the job done for relatively simple bots.
Discord Bot Maker is an application available on Steam that lets you create a bot right from within its user interface.
")
If you’re a complete beginner to JavaScript, this is important:
Even though this gets you pretty close to “no-code”, it still requires a little bit of programming knowledge in JavaScript, or at least the persistence to figure things out.
If you really want to avoid code like the plague, you might find it a bit difficult to use.
There is good news, though. Discord Bot Maker has a fairly well built-out documentation library where you can find help/answers/suggestions.
There’s also a forum and Discord server where you can ask questions and get answers if you find yourself stuck.
Looking to the Future: “No Code” Bot Development Tools to Come
You might have noticed that this list is rather small… but that’s only because we haven’t yet found an “all in one” Discord bot development tool with a drag-and-drop type of builder for creating your own bots. In other words, one that’s truly zero code.
But not all hope is lost. It’s highly likely someone will develop another amazing bot creation tool for Discord further down the line.
What you should do next
You have several options here. Either go with a third-party application like Discord Bot Maker or start learning a little bit of code so that you can fully create and customize your bot exactly how you want it.
If you want to make something very simple, go with a third-party bot maker. This lets you get out of writing most of the code you’d need for a bot.
If you want to make something more complicated, such as a Discord bot with a handful of features and customization, I’d strongly suggest choosing a programming language and referencing the rest of this guide to start creating a bot with code.
Whatever option you choose, there’s no right or wrong decision.
Pick the path that fits your current situation best, and then make the most of learning/mastering that toolset!
Add Your Bot to Discord: Getting Your Token and Putting Your Bot Online
")
Before you can put your bot online and bring it to life, you have to (1) Create a bot application through Discord (2) Generate a secret token that’ll act as the “key” to controlling your bot, and (3) Have your bot join your server!
Once you have these in place, it’s just a matter of using your token to make your bot do what you want it to do programmatically. If you want to learn how to use your token in code, take a look at the first few portions of this guide. We have examples of doing this in Java, C#, JavaScript, and Python.
Bringing your Discord bot to life
Right now we’ll focus on adding your bot to Discord, getting your token, and finally putting your bot online!
For a detailed step-by-step process (illustrated), you’ll want to follow this guide to generating your bot token.
")
You’ll start by going to the Discord Developer Portal on discordapp.com and creating a new application.
Once your application is created, you’ll give your bot a name, a description, and even a nifty icon if you want to really bring it to life.
Once you have your bot’s information filled out, it’s just a matter of going to the “Bot” tab in the Developer Portal and clicking the “Add Bot” button. Up to this point, we created an application, but as soon as you click “Add Bot” it converts your plain old Discord application to a bot application.
You’ll see the message, “A wild bot has appeared!”, and then have the option to reveal your token.
Step 5 in the Discord Bot Token Guide walks you through adding your bot to your server and creating the URL (link) you’ll need for this to work successfully.
Now what? Next steps
If you’ve followed the guide above to a tee, you should see your bot appear in your Discord server as OFFLINE.
")
This is okay, and this is all normal. Your bot will show as offline until you bring up and run your bot’s code.
Your bot’s program acts as the “control system” / “server” for your bot; it communicates with Discord through their API to get a little trigger when an event happens on Discord and then reacts to that trigger through the code you wrote.
If you have your bot user application created and you see your bot in your server, the next step is to follow one of the bot programming guides we provided (in any language of your choice).
As soon as you get to the last step where you turn on your application, you’ll see your bot come online in your server and start responding and reacting to events!
")
And that’s all there is to it. You have successfully brought your Discord bot to life!
Coming Up With Genius Discord Bot Ideas
")
Coming up with bot ideas can be tough! But it doesn’t have to be…
In this section, we’re going to go over how you can generate hundreds of practical, interesting, and exciting bot ideas on demand!
We’ll walk through a few brainstorming and idea generation steps, and then go through the most common types of bots you can create for Discord to give you some initial inspiration.
Sometimes… Ideas don’t come easy
I’ve always found that when I actively try to think really hard and come up with some ideas of what bot to make, it seems almost like my thoughts get “blocked” and the creativity doesn’t flow…
It’s kind of like writer’s block.
But when you really let yourself loose, let your mind wander, and start getting inspiration from things around you, then the thoughts flow freely and you get overwhelmed with ideas.
There are times we get more ideas than others, like when walking outside in nature or taking a relaxing shower. I’m sure you’ve had a great idea pop into your head in one of these situations… I sure have.
The key is to use these moments of creativity to their fullest and write down our ideas as soon as we get them. That way we don’t forget and start creating an “idea list” that we can come back to later.
Anyways, let’s start with some “idea generation” exercises to get your thoughts flowing.
Bot Idea Generation Exercises
The first exercise we’re going to do for coming up with bot ideas is to list out at least 20 items you think could potentially become a bot.
There is absolutely no filter at this stage — your ideas should basically be a complete brain dump of ideas. Don’t hold anything back.
For some inspiration, you’re going to want to come up with ideas that are:
What you wish your server had (that’s currently missing)
What you saw on other servers (that caught your attention)
Your activities, hobbies, or interest (such as game titles, hobbies, and the like that don’t have any bots associated with them)
")
After you have a list of 20+ ideas, we’re going to go through and filter them by their “viability”.
We do this by placing them into the square that most closely matches the following two filters we’ll be using:
The first filter is your interest. Is this something interesting to you? Does it get you excited? Would you really go all in to make a bot around this idea?
The second filter is demand. Based on searching around, checking other servers, looking at what’s currently active, and keeping up with trends, is this bot idea something that’s popular and that people are actively searching for?
")
Draw out this diagram on a piece of paper and start putting your ideas into each square based on how they pan out.
Once you have them all organized, then you’ll have a much easier time making a decision about which bots to go after first.
The ideal situation is the upper right square – “The Dream Bot”.
These are all ideas that you’re super interested in and they have a huge amount of people currently active and looking around for it.
The next square you should take a look at is the bottom right – “Embrace the Grind”.
These are all bot ideas that you don’t find interesting, but they do have a lot of people actively searching for these things and need bots like this.
It’ll be a real grind to make since it’s not of interest to you personally, but if it’s something you’re willing to grind through — it’ll be well worth it!
The two left squares, “Great Idea Low Potential” and “Don’t Bother” are the ones that I personally wouldn’t recommend going after.
If you’re truly passionate about a certain bot idea and want to make it no matter who uses it (the upper left square), then I’d say go for it. Just know that your bot likely won’t be picked up by a large number of users.
And this is how I generate ideas for bots. You do a brain dump of everything you’ve seen and all of the possibilities you think you can create, and then you filter them down by their viability.
What you have in the end is a clean, filtered-down list of ideas that have true potential.
As you start coding your next bot, these are the ideas you’ll want to go after.
Types of Bots You Can Create
We just went through an awesome idea generation exercise, but what if you wanted even more inspiration?
Here we’re going to talk about all of the types of Discord bots you can create that have risen in popularity throughout the last several years. We’ll start with the most popular first (music bots), and then go down the list in no particular order.
Music Bot
")
Music bots are the most popular of them all. These are essentially bots that add music queues and music playing capability to your server.
Everyone wants to make their Discord server more entertaining and engaging to everyone whose active in their community, and having a music bot is just a natural way of making that happen.
It’s an easy way to make your server’s audience more engaged by letting them add music to the queue, choosing which songs they want to play, or even taking one of your playlists and letting it play along.
Music bots are probably the most difficult type of Discord bot to create, but they are well worth it!
Chat Bot
")
Chatbots are (typically) very simple Discord bots that send and reply to chat messages. You can have a bot that detects languages other than your server’s native language and automatically translates those messages… or you can have a bot that welcomes everyone who joins your channel.
The possibilities for chatbots are endless, and the amount of logic and “smarts” you put into your own chatbot is entirely up to you!
Economy Bot
")
Economy bots are great for any server. They let your users gather and earn “fake” digital currency that they can then use to unlock certain privileges, get rewards, and the list goes on…
The most sophisticated economy bots literally build up a full economy system within your Discord server. You have users who win money through playing games (like blackjack, for example), and can then “purchase” gift packages for themselves.
You can also allow your users to trade amongst themselves or even get a barter system going.
Either way, if you want to really drive up the engagement of a Discord server, implementing an economy bot is a smart move.
Verification Bot
")
A verification bot typically has two purposes: (1) To prevent raids and spam and (2) To only allow known and allowed members to interact with your server/channel.
Whenever someone joins your server, all of that server’s channels can be locked out to that user before they respond to a certain message, password, or “captcha”.
If you want a great project idea to build that’ll add some more security and peace of mind to your server, then a verification bot just may be the perfect project!
Moderation Bot
")
We all know about human moderators and how they “police” your server in order to kick, ban, or mute inappropriate users.
Well, a moderation bot does the same thing, just automatically. It can filter by curse words, certain messages sent in the chat, or stop someone from spamming the same chat over and over 1,000 times.
Moderation bots are a great way to make your human moderator’s job easier, and also a great bot project to start out with.
Giveaway Bot
")
Running giveaways manually can be tough. You have to start the giveaway, monitor everyone who enters your giveaway, and then sort through the huge list of entries to determine the winner(s).
Giveaway bots automate this entire process, and they aren’t too complex to set up either.
A good giveaway bot will prompt you for what your giveaway is called, how many winners there are, and what you’re giving away. You can then choose a certain “reaction” or “entry trigger” for users in your channel.
Whenever they react to the message or respond with a certain word, they’ll be entered in your giveaway.
After a certain amount of time, the bot automatically chooses winner(s) at random — and everyone’s happy!
If you want a fun project for your next Discord bot, creating a giveaway/contest bot may be a lot of fun.
Meme Bot
")
Ah, meme bots. These are purely for entertainment value, and for engaging all of the users in your Discord server.
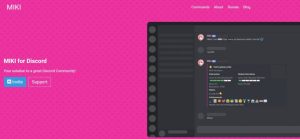
There are thousands of meme bots out there, but what ties them all together is a central theme (like Miki Bot for example).
You can have “funny meme bots” or “anime meme bots”, etc. As long as you tie your bot to an entertaining and funny theme with memes involved, you’ll have a good chance of it taking off.
Meme bots typically have either “hardcoded” memes (they don’t change), or they pull memes/images from certain image databases by certain keywords or random searches.
However you choose to do it, making a meme bot is a great idea to build up engagement and start building a better Discord community for your server.
Dice Bot
")
Dice bots are very popular, and also very simple. These can be used for users battling it out and rolling for a certain item or privilege… or it can even be used for RPGs like DnD on your Discord server.
Whatever the case may be, dice bots typically have the flexibility of specifying either a maximum number you want to roll up to (i.e. !roll 100 – gives you a random number between 1 and 100), or actually specifying the number of dice and sides per die (i.e. !roll 2d6 – will roll two dice with 6 sides each).
You can get creative with how you develop your dice bot if you choose to go this route, but remember that it’s a relatively easy project that could be perfect for getting your hands on Discord bot development.
Getting even more inspiration and checking which Discord bots already exist
We’ve gone through how to make your own Discord bots and the most popular types of bots out there, but what if you wanted even more inspiration and a huge list of all the bots that exist on the internet today?
Well, I’d recommend taking a look at discordbots.org for this purpose. They have lists of the most popular Discord bots available to date, and a nice search engine that allows you to find the exact type of bot you’re looking for.
Who knows, once you develop your own bot, it might end up on one of these top lists itself!
In any case, feel free to browse around on that website or the many other bot directory sites out there on the web.
On top of that, don’t forget to search around on GitHub.com for Discord bots written in your favorite language. These are all open-source bots that you can open up, look behind the scenes at, and see exactly what they did to make it all work.
I guarantee you’ll find even more inspiration if you do these two things consistently, and be on your way to making the “next big thing” in the land of Discord.
Final Thoughts
Phew, this has been quite the journey, hasn’t it?
Congratulations on making it to the end of this ginormous guide on everything you need to know to make your own Discord bots.
We walked through making your bot in a variety of programming languages — everything from Python to C# to Java and even on mobile.
We looked at how you host your Discord bot for maximum 24/7 uptime, and how you can come up with awesome ideas for your next bot through a few simple brainstorming exercises.
If you want to learn even more about making your very own Discord bots from scratch, don’t forget to join the Discord Bot Community today!
I wish you the best of luck in your botting adventures!

Why did you not mention JDA, only JavaCord and Discord4j?
Yes!